
Photo by Jakub Zerdzicki on Pexels
ESD-Safe 3D Printed Parts for Electronics

Electronics manufacturers, repair shops, and hardware startups all end up needing the same thing: custom trays, holders, and fixtures that fit their boards exactly. 3D printing is a fast way to get them, but there is a catch that catches many first-time buyers off guard. Standard filament is an electrical insulator, and ESD-safe 3D printing requires a different material approach than the PLA and PETG most printed parts are made from.
This post covers why static matters, what “ESD-safe” actually means, where printed parts make sense in electronics work, and what to specify when you request them.
Why Does Static Matter for Printed Parts?
Electrostatic discharge damages components quietly. A person has to build up roughly 3,000 volts before they feel a static shock, yet many semiconductor devices can be damaged at a small fraction of that. Some are susceptible below 100 volts. The damage is often latent: a part passes initial testing, then fails weeks later in the field.
Plastic is a strong static generator. When two materials touch and separate, charge transfers between them. This is called triboelectric charging. An insulating plastic tray that a board slides in and out of can build up a charge and hold it, because the charge has nowhere to go. Standard PLA, PETG, ABS, and nylon all have surface resistance well above 10^12 ohms, which puts them firmly in the insulative range.
Printed parts add their own wrinkles. FDM parts have layer lines, internal voids, and textured surfaces. They can also pick up dust and filament debris. None of this helps in a static-controlled environment, and it is a good reason to think about the material and the application before printing anything that will touch bare boards.
What Does “ESD-Safe” Actually Mean?
It is a resistance range, not a single property. ESD standards in the ANSI/ESD family classify materials by surface resistance:
- Conductive: below roughly 10^4 ohms. Charge flows very quickly, which can be a hazard of its own around powered circuits.
- Dissipative: roughly 10^4 to below 10^11 ohms. Charge drains away in a controlled way. This is the target range for most ESD-safe handling products.
- Insulative: above roughly 10^11 ohms. Charge accumulates and stays.
Marketing terms are not certifications. A filament labeled “ESD” or “antistatic” is a starting point. The only way to know a finished part performs is to measure it. Surface resistance is typically checked with a resistance meter and a standardized probe, and the standard test methods specify humidity conditioning because resistance can shift significantly with moisture in the air.
Grounding is part of the system. A dissipative tray does nothing useful if it sits on an ungrounded surface. ESD control is a program that includes wrist straps, mats, flooring, and procedures. Printed parts are one component of that system, not a replacement for it.
What Materials Are Used for ESD-Safe 3D Printing?
Carbon-filled and carbon-nanotube-filled filaments. Filament makers add conductive carbon to a base polymer such as PETG, ABS, or nylon to bring the resistance into the dissipative range. Prusa recently released a carbon-fiber and carbon-nanotube-filled filament aimed at static-sensitive electronics manufacturing, which reflects a broader trend: ESD-capable materials are becoming easier to buy and use on standard FDM machines.
Print behavior differs from plain PETG. Carbon-filled materials are abrasive, so they generally need a hardened steel or similarly wear-resistant nozzle. They can also be stiffer and more brittle than the unfilled base polymer, and they often have a matte, dark finish. Always follow the manufacturer’s data sheet for temperatures and drying requirements.
Be honest about where each material fits. PLA and PETG are what we print daily, and they are excellent for most prototypes, fixtures, and production parts. Carbon-fiber composites are something we can print, but they are a capability rather than our everyday material. If your project depends on verified ESD performance, tell us up front so we can discuss material sourcing and what testing is realistic before you commit to a batch.
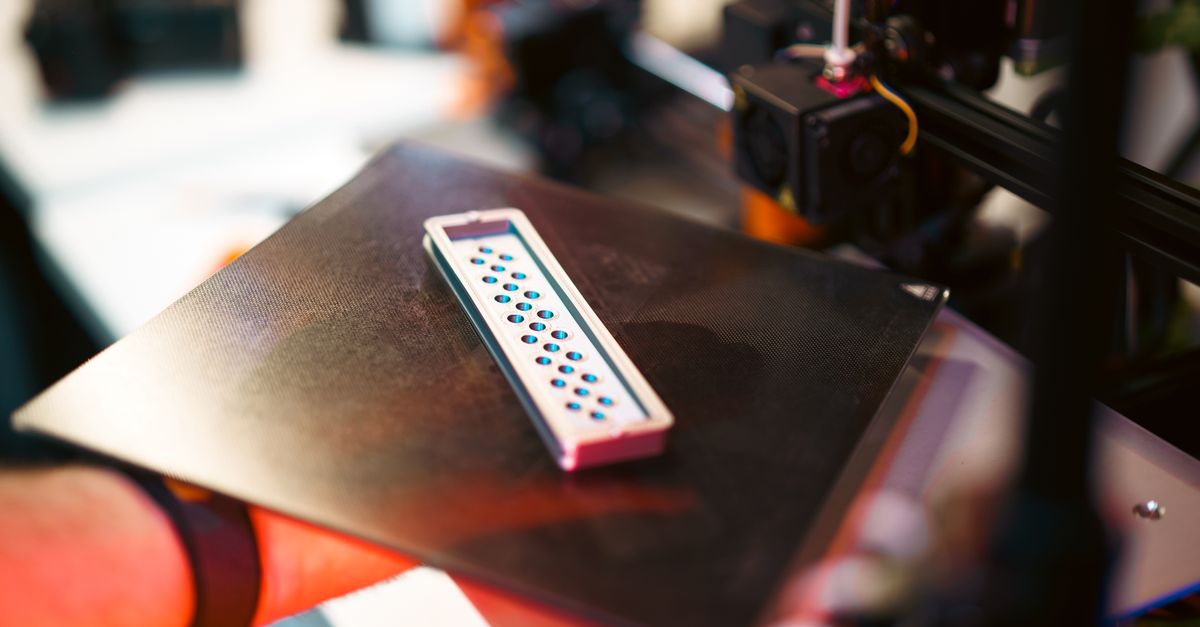
Photo by Jakub Zerdzicki on Pexels
Where Do Printed ESD Parts Make Sense?
Custom trays and nests. Standard thermoformed trays are cheap at volume, but a custom board or odd-shaped assembly rarely has one. A printed nest with pockets sized to your components can be designed and printed in a day or two, then revised easily. This pairs naturally with small-batch production when you need a dozen or a few hundred trays.
Test and programming fixtures. Holding a board in a repeatable position for probing, flashing firmware, or functional testing is a classic manufacturing tooling and fixtures job. If you are new to this area, our guide to fixtures and jigs for manufacturing teams covers the design logic.
Assembly aids. Soldering jigs, connector insertion guides, cable routing forms, and board supports are low-volume, high-variety parts where printing wins on lead time.
Prototypes before committing to tooling. If you are developing a product, you can validate fit and workflow with standard materials first, then move to an ESD-capable material once the geometry is settled. Our rapid prototyping service is built for that kind of iteration.
When Is Standard PLA or PETG Fine?
Not every electronics part touches a sensitive component. A printed bracket, cable clip, display stand, or machine guard that never contacts bare boards usually does not need to be ESD-rated. Using specialty material there just adds cost.
Enclosures are a separate question. Whether a housing needs to be dissipative depends on the electronics inside and how users handle them. We cover geometry, venting, and mounting in 3D printed enclosures for electronics, and the right choice often comes down to risk assessment with your own engineers. If you want a refresher on base-material trade-offs first, see PLA vs PETG vs ABS.
Topical antistatic treatments are temporary. Sprays and coatings can reduce static on a plain plastic surface, but they wear off with handling and cleaning. Treat them as a stopgap, not a substitute for a dissipative material in a controlled process.
Design Tips for ESD-Capable Printed Parts
Plan for layer direction. FDM parts are not perfectly uniform. Resistance can differ along the layers compared to across them, so a part’s measured value may depend on where you probe. Orient and design so the contact surfaces that matter are consistent, and see our guidance on part orientation.
Avoid insulating finishes. Paint, clear coat, and some smoothing treatments can add an insulating layer over a dissipative material and defeat its purpose. If you need cosmetic finishing, check with the material manufacturer first. Our finishing standards explain which finishing steps change surface properties.
Keep surfaces clean and simple. Rough, fuzzy surfaces trap debris. Gentle fillets, adequate pocket clearances, and moderate wall thickness (often 1.2 to 2.0 mm for trays) make parts easier to clean and handle.
Design finger access and orientation cues. Operators in a static-controlled process are wearing gloves or wrist straps and working quickly. Thumb notches, chamfered lead-ins, and clear polarity markers reduce handling errors. For general cost-saving geometry rules, see design rules that save money on 3D prints.
How Should You Verify Printed ESD Parts?
Measure, do not assume. If ESD performance is a requirement, build verification into your process: measure surface resistance on sample parts from the actual print batch, under defined humidity conditions, using the method your quality system specifies. Our 3D printing validation testing guide outlines a sensible way to structure that kind of acceptance testing.
Check the first article. Before approving a full batch, inspect and test a first piece. The process in first-article inspection for 3D printed parts works equally well for dimensional and functional checks on trays and fixtures.
Re-test over time. Wear, cleaning chemicals, and contamination can change surface behavior. Include printed ESD items in your periodic ESD audit just as you would any other handling product.
What Should You Include in a Request for ESD-Related Parts?
A clear request saves time and avoids surprises. When you reach out, include:
- The application. What touches the part, and how sensitive are the components?
- A resistance target or standard. Your quality system or customer may specify a range or reference standard.
- Quantity and timeline. A few prototypes and a few hundred production trays may call for different approaches.
- CAD files or reference parts. If you have no model, our custom design services can build one from your board outline or a physical sample.
- Cleaning and handling requirements. Chemicals, temperatures, and finishing restrictions matter.
Talk to Us About Your Electronics Fixtures and Trays
We print in PLA and PETG every day, offer ABS periodically, and can work with carbon-fiber composites and other engineering materials when the application calls for it. If you are building custom handling parts for electronics, send us your requirements and we will give you an honest read on what is realistic, including when standard materials are enough and when a specialty material is worth the extra cost.
Start your project at /custom-order and tell us what you are building.
Related Reading
Related Articles

3D Printed Molds and Casting Patterns
3D printed molds and casting patterns let you make silicone, urethane, and thermoformed parts without steel tooling. Here is what works and what does not.
3D Printed Shop Floor Organizers for 5S
3D printed shop floor organizers turn 5S from a poster into a system. See what to print, which materials hold up, and how to design for real use.
Embedding Magnets and Hardware in 3D Prints
Embedding magnets in 3D prints adds function and clean assembly. Learn pocket sizing, pause-and-insert steps, and design rules that work in FDM.