
Photo by Jakub Zerdzicki on Pexels
3D Print Finishing Standards for Pro Results

Surface finish can make or break the perception of your 3D printed parts. Whether you’re creating prototypes for investor presentations or functional components for end-use applications, understanding finishing standards helps you specify the right level of post-processing for your project - and your budget.
What Defines “Professional” Surface Finish?
Professional finish means meeting the functional and aesthetic requirements of your specific application. A manufacturing jig might need minimal finishing beyond support removal, while a customer-facing prototype could require extensive smoothing and painting. The key is matching the finish level to the part’s purpose.
Surface finish in FDM printing starts with layer height. Standard 0.2mm layers create visible stepping on curved surfaces. Fine 0.1mm layers reduce this effect but double print time. For many functional parts, standard layer height with proper orientation provides an acceptable finish without the time penalty.
Post-processing transforms raw prints into refined parts. The spectrum ranges from basic support removal to multi-step finishing protocols that rival injection molded surfaces. Each level adds time and cost, so understanding your actual requirements prevents over-specifying (and overpaying).
Surface Roughness Standards and Measurements
Manufacturing professionals often specify surface roughness using Ra values (average roughness in micrometers). Understanding how 3D printed surfaces compare to traditional manufacturing helps set realistic expectations.
Raw FDM prints typically achieve:
- PLA at 0.2mm layers: Ra 20-25 μm
- PETG at 0.2mm layers: Ra 15-20 μm
- ABS at 0.2mm layers: Ra 18-23 μm
- Fine settings (0.1mm): Ra 10-15 μm
For comparison, machined surfaces range from Ra 0.8 μm (fine finish) to Ra 6.3 μm (standard). Injection molded parts typically measure Ra 0.2-1.6 μm depending on mold finish. While raw FDM prints can’t match these values, post-processing bridges much of the gap.
Photo by Jakub Zerdzicki on Pexels
Basic Finishing: Clean and Functional
Basic finishing creates clean, functional parts suitable for engineering validation, manufacturing tools, and behind-the-scenes applications. This level typically includes:
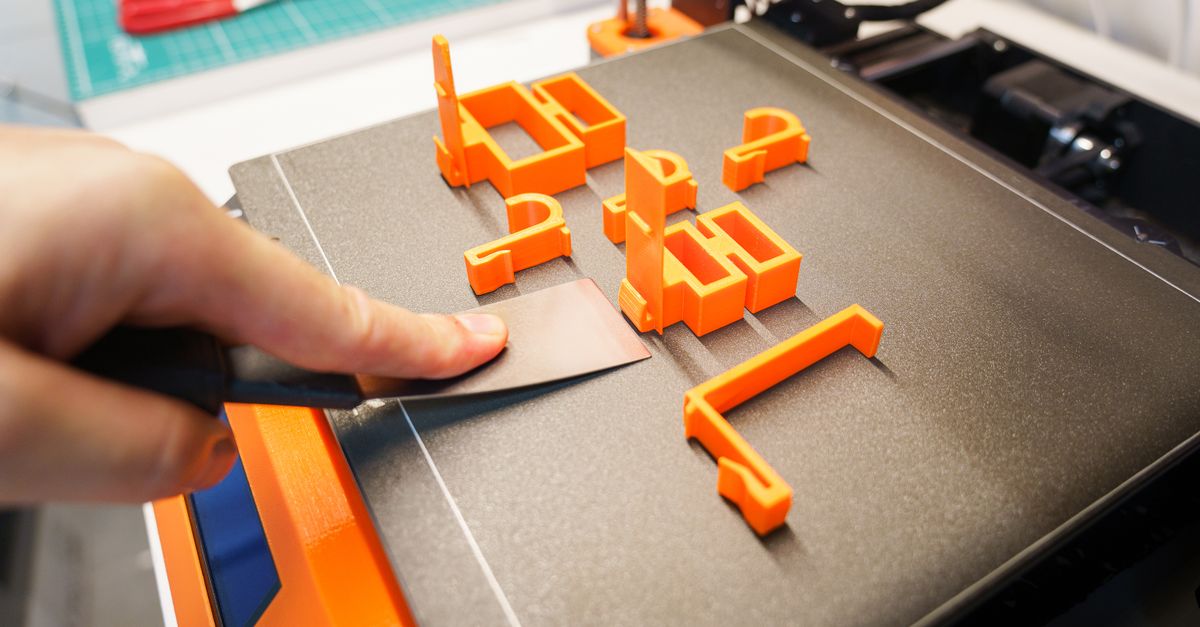
Support removal and cleanup. Modern slicer software generates supports that break away cleanly, but connection points often need light sanding. Flush cutters remove support material close to the surface, followed by 220-grit sandpaper to smooth remnants.
Edge deburring. FDM printing can create small strands or “wisps” at sharp edges. A deburring tool or craft knife quickly removes these artifacts. For PETG parts that see handling, deburring prevents cuts from sharp edges.
Hole sizing. Printed holes typically run 0.1-0.2mm undersized due to material shrinkage. For precise fits, a drill or reamer opens holes to exact dimensions. This step is crucial for parts that interface with standard hardware.
Basic finishing adds 5-15 minutes per part depending on complexity. It’s the sweet spot for functional prototypes and manufacturing aids where appearance isn’t critical.
Intermediate Finishing: Smooth and Presentable
Intermediate finishing suits customer-facing prototypes, fitment samples, and parts requiring moderate aesthetics. These techniques significantly improve surface quality without extensive labor.
Progressive sanding. Starting with 220-grit removes layer lines, progressing through 400 and 800-grit creates increasingly smooth surfaces. Wet sanding with higher grits prevents plastic dust and achieves better results. Focus on visible surfaces - hidden areas rarely need this treatment.
Primer application. High-build automotive primer fills minor layer lines and provides a uniform base for painting. Apply thin coats to avoid obscuring fine details. Sand between coats with 400-grit for optimal smoothness. Two to three primer coats typically suffice for FDM parts.
Gap filling. Spot putty or automotive body filler addresses larger imperfections. Mix small amounts and apply with a putty knife. After curing, sand flush with surrounding surfaces. This technique salvages prints with minor defects that would otherwise require reprinting.
Intermediate finishing requires 30-60 minutes per part. The results satisfy most presentation needs without the cost of advanced techniques.
Advanced Finishing: Exhibition Quality
Advanced finishing creates parts indistinguishable from traditionally manufactured components. These techniques demand time and skill but deliver exceptional results for high-stakes applications.
Vapor smoothing (ABS only). Acetone vapor chemically melts the surface of ABS parts, creating glossy, injection-molded appearance. Professional vapor smoothing chambers provide controlled, repeatable results. This process eliminates layer lines completely but slightly reduces dimensional accuracy and sharp details.
Multi-stage painting. Automotive painting techniques adapt well to 3D printed parts. After priming and sanding to 800-grit or finer:
- Apply base coat in thin, even layers
- Wet sand with 1000-grit between coats
- Add color coats with proper flash time between applications
- Finish with clear coat for durability
- Polish with compound for mirror finish
Electroplating preparation. While we don’t offer plating services, preparing parts for external plating requires meticulous surface preparation. Conductive paint application must be perfectly smooth and complete. Any surface defects amplify during plating.
Advanced finishing can require 2-4 hours per part. Reserve these techniques for appearance models, show prototypes, and parts where perception equals reality.
Industry-Specific Finish Requirements
Different industries have evolved their own finish standards based on application needs and regulatory requirements.
Automotive and aerospace. These industries often specify exact Ra values for functional surfaces. Bearing surfaces might require Ra 0.8 μm (achievable only through machining after printing), while non-critical surfaces accept Ra 6.3 μm (reachable with intermediate finishing).
Medical device prototyping. Even non-functional prototypes often require smooth finishes to prevent bacterial harboring in surface irregularities. Sealed surfaces using epoxy coating or vapor smoothing meet visualization needs while clearly indicating prototype status.
Consumer products. Finish requirements vary dramatically based on perceived quality tier. Budget products might ship with basic finishing, while premium items demand advanced techniques. The key is consistency - all parts in a batch must match.
Finishing vs. Reprinting: The Time-Cost Analysis
Sometimes reprinting with optimized settings beats extensive post-processing. Consider these factors:
Orientation optimization. Rotating a part to minimize visible layer lines on key surfaces often eliminates finishing needs. Our Part Orientation Magic: Print Success Secrets guide covers orientation strategies in detail.
Material selection impact. PETG naturally provides smoother surface finish than PLA. For parts requiring minimal post-processing, material choice influences total project time more than finishing techniques.
Batch considerations. Finishing one prototype might take 30 minutes. Finishing 50 units could require 25 hours of labor. At production quantities, optimizing print settings to minimize post-processing pays dividends.
Setting Realistic Expectations with Clients
Clear communication about achievable finishes prevents disappointment and scope creep. We recommend this approach:
Show physical samples. Nothing beats holding examples of basic, intermediate, and advanced finishes. Clients immediately understand the differences and associated costs.
Document requirements upfront. “Smooth finish” means different things to different people. Get specific about which surfaces need attention and acceptable roughness levels. Photos of acceptable reference parts help immensely.
Price finishing separately. Break out post-processing costs from printing costs. This transparency helps clients balance their finish requirements against budget constraints.
Environmental and Safety Considerations
Post-processing introduces chemicals and particles requiring proper handling. Professional finishing demands:
- Ventilation for sanding dust and primer fumes
- Appropriate respirators for vapor smoothing
- Proper disposal of solvents and paint waste
- Safety equipment including eye protection and gloves
These requirements add overhead but ensure consistent, safe results. DIY finishing often overlooks these factors, leading to health risks and inconsistent quality.
The Future of Automated Finishing
Industry trends point toward increased automation in post-processing. Vapor smoothing chambers already automate one advanced technique. Emerging technologies include:
- Robotic sanding systems that follow part geometry
- Automated support removal using ultrasonic or chemical methods
- In-line finishing that processes parts immediately after printing
- AI-driven quality inspection for finish consistency
While fully automated finishing remains years away for small-scale operations, these developments will eventually democratize professional surface quality.
Ready to Achieve Professional Results?
Understanding surface finish options helps you specify exactly what your project needs - no more, no less. Whether you need basic functional finishing or exhibition-quality surfaces, we’ll help you balance quality requirements with project timelines and budgets.
Visit our custom order page to discuss your surface finish requirements. We’ll recommend the most cost-effective approach to achieve your quality goals.
Further Reading
Related Articles
Waterproofing 3D Prints: Methods & Materials
Learn proven techniques to make FDM 3D printed parts waterproof for outdoor and liquid-contact applications.

3D Printing Validation Testing Guide
Master validation testing for 3D printed parts with dimensional checks, strength tests, and material verification methods.

Cost-Per-Part Calculator for 3D Printing
Master the hidden variables that determine your true 3D printing costs and make smarter sourcing decisions.